Migrate Your Static Website to Azure

In the good old days you hosted your website yourself or using a dedicated web hosting provider. Whichever option you chose you needed a machine, virtual or physical, with a full operating system that needed patching, some sort of remote access, web hosting software such as Apache or IIS and some sort of SSH or RDP access. And perhaps it’s own firewall rules. That is a lot of investment for just a blog.
To allow your website to serve dynamic content it may have used Java, Javascript or Perl on the server side. That adds additional complexity, adds one more layer to patch and has security implications which you can probably already guess at.
These days a lot of people are turning to static websites, which have no server component beyond hosting the web content. This makes the web delivery very quick, cuts down on attack surface as there is no server side complexity and adheres to the KISS principle - Keep It Simple Stupid.
If you have a static website we can now introduce a third option - Azure Static Website:
- It’s cheap;
- There is no machine, physical or virtual for you to worry about. No operating system to patch. No web hosting software to keep up to date;
- It has built in redundancy (depending on the options you choose);
- It’s setup and forget;
- It’s maintained by Microsoft who maintain the entire Azure stack so they are on the ball with security and firewalling your site from attacks;
- SSL certificates are free and managed for you;
- Many others;
If you have the £150 Azure new account credit, or an MSDN / Azure DevOps / Visual Studio subscription, then you will already have credit to try this out for free.
So let’s get started!
Create A Storage Account in Azure
Clearly the first step in creating your new site is to have a place to store all of that fantastic web content! Hosting a static website on Azure requires StorageV2 which is now the default storage type in Azure:
- Login to the Azure portal;
- Either click on Storage Accounts or search for
Storage Accountsand click on it; - Click Add;
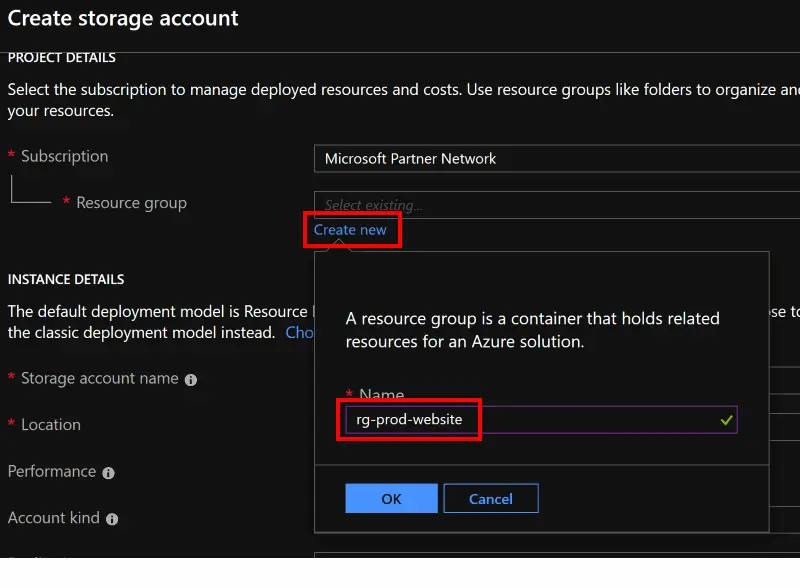
- I recommend creating a separate resource group for hosting your site but if you have one you want to use, select it in the dropdown Resource group box. Otherwise click Create new and enter into Name the new Resource Group;
- Enter the Storage account name which is just a name to identify this account;
- For this blog post we are going to leave the Location, Performance, Account kind, Replication and Access tier at their defaults. However, explore and understand those options and change them as you need to. Note that Account kind needs to stay as
StorageV2for you to host a static website. You may also want to look and change Location if you will not be using Azure CDN;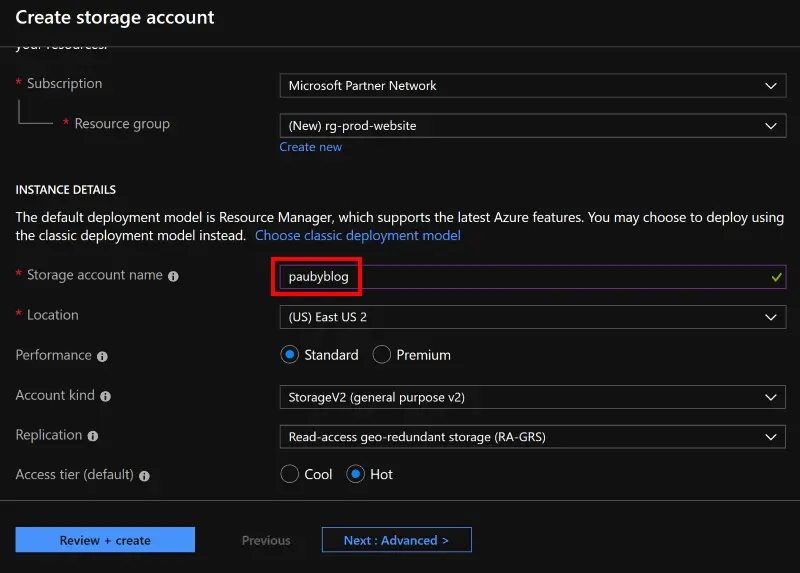
- Click Review + create. Review the choices and click Create when you’re happy;
- It will take a minute or so for Azure to create the Storage Account;


Create An Azure Static Website
We have the storage space for our website content but without it being served they are just files on a hard drive, somewhere in a Microsoft Datacenter. So lets set that up:
- From the Azure portal click Storage Accounts;
- On the list click the storage account you created, in our case it was
paubyblog; - On the Actions pane that appears scroll down to the Settings section and click Static website;
- Toggle the button from
DisabledtoEnabled. In Index document name enter the name of your index page, which will likely beindex.html. In Error document name enter the name of your error, or 404, page which will likely beerror.html;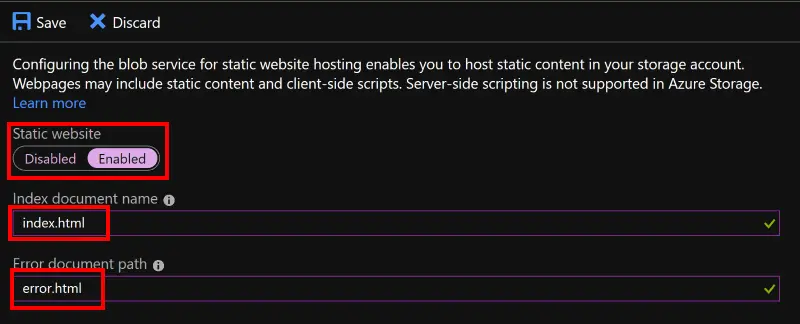
- Click Save;
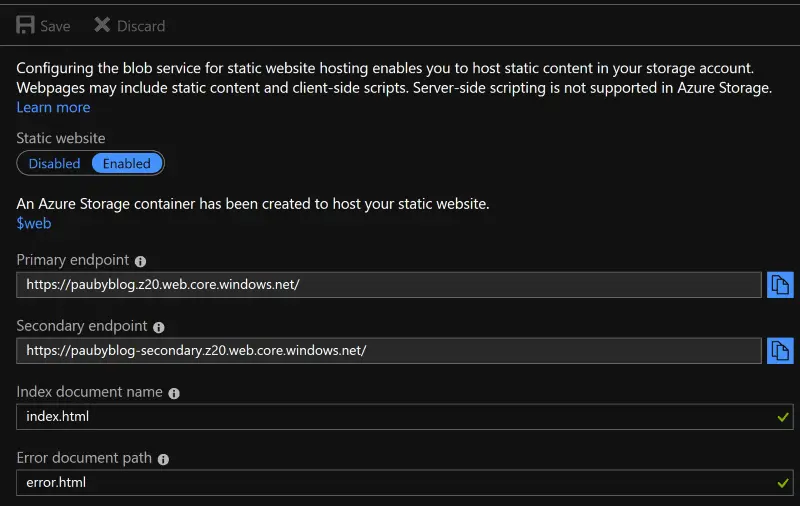
- Note down the Primary Endpoint as we will need this later;


So we’ve created the website. That’s the first big step on the road. However the site is empty. We need to populate it with some content.
Add Website Content
For this blog post I’m going to create a simple ‘Hello World’ index.html webpage. You might want to upload your static website instead and if you do most of the steps are the same. If you are uploading your own website I would recommend downloading and installing the Azure Storage Explorer (Chocolatey command choco install microsoftazurestorageexplorer -y) as the Azure site does not make it easy to upload multiple files and folders:
- If you will be uploading your own website you can skip this step. Create a text file, in your favourite editor, with the contents
<p>Hello World!</p>and save it asindex.html; - From the Azure portal go to Storage Accounts;
- In the list click the storage account you created, in our case it was
paubyblog; - On the Actions pane scroll down to the Blob service section and click Blobs;
- In the Storage account: paubyblog pane, click $web. $web is where any web content is served from.;
- In the $web Container pane, click Upload;
- In the Upload blob pane click the small folder at the end of the
Select a filefield and select the Hello World!index.htmlfile you created above, and then click the Upload button. If you are uploading your own website, launch and log into Azure through the Azure Storage Explorer mentioned above and upload your files to the $web blob container.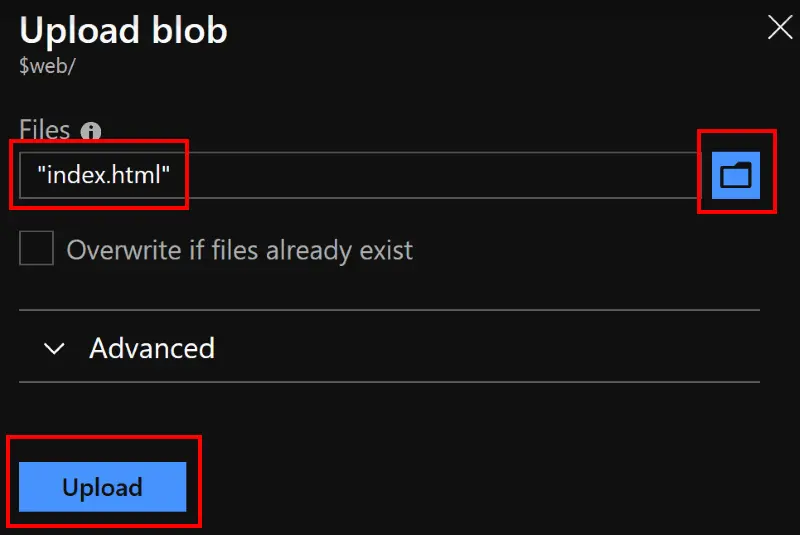

Now you’ve uploaded some web content, open your browser and enter the Primary Endpoint we noted earlier and you should see either the Hello World! webpage or your own website.
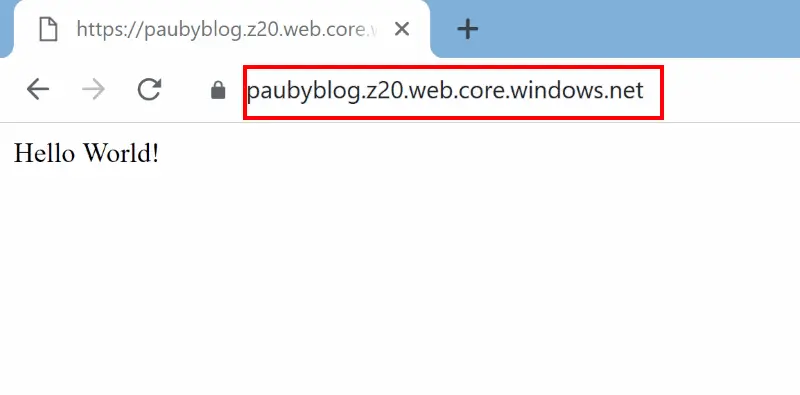
So now you have a functioning website. If you used the Hello World! example index.html file then it is fairly basic. If you uploaded your own static site then you have your full website. The URL is not pretty but you can use it without purchasing your own domain name. Note that your site is also secured using the Azure SSL certificate.
If you are migrating your website then you will likely have your own custom domain name to bring with you. We can also do that in Azure but it needs a little more configuration which we will add in the next blog post.
