Build a Chocolatey Package Repository using Azure DevOps Artifacts Feed

The Chocolatey Community Repository currently has 6,655 unique packages. When we add up the versions of each of those packages it grows to 65,549. That’s a lot of packages. A lot of storage needed to house them all. And a lot bandwidth needed for you to download them.
But the Chocolatey Community Repository is not for everybody. Chocolatey doesn’t recommend organizations use the community repository directly for several reasons.
To increase the stability of the site, and to allow everybody to use it responsibly, Chocolatey has implemented checks and balances to achieve that:
In day to day use the vast majority of Chocolatey users will never hit these limits. If you are using the community repository in an organizational context then you will likely hit these limits quickly. So Chocolatey recommends using an offline installation for an organization that will allow you to install Chocolatey packages from your own private feed.
There are many options to host your own Chocolatey package feed, including:
- Sonatype Nexus;
- JFrog Artifactory;
- MyGet;
- ProGet;
- Chocolatey.Server (AKA Simple.Server - Chocolatey does not recommend you use this for anything but the most basic of installations);
The one option not mentioned above is the one we are going to be looking at in this blog post - Azure DevOps Artifact feed.
If you want to skip to the sections you’re interested in then use the section list below. However, please make sure you checkout the pre-requisites.
- What Is A Feed
- What Do We Need Before We Start?
- Create the Azure DevOps Artifacts Feed
- Pushing Chocolatey Packages
- Adding A Chocolatey Azure DevOps Feed Named Source
- Installing Chocolatey Packages From Azure DevOps Artifacts Feed
What Is A Feed
A feed is simply a place where you store all of your packages and all of the package versions. And it wouldn’t be much use unless it also allowed you to retrieve your packages too.
There are different types of packages that feeds can store. In this post we are only going to look at NuGet package feeds, as this is what Chocolatey works with.
NuGet Feeds
The Azure DevOps Artifacts feed we are going to create is actually just a NuGet feed. There are two versions of NuGet that we need to be concerned with here: v2 and v3. The Azure DevOps Artifacts feed we create is v3. Chocolatey, at the time of this writing, requires a v2 feed. The Azure DevOps Artifacts feed does support v2, but we need to make a small, but simple adjustment for that, later. To quote the Chocolatey documentation:
The packaging framework Chocolatey uses is known as NuGet (and also part of where Chocolatey gets its name). Chocolatey extends NuGet to add more metadata to packaging (the nuspec file) and known automation scripts for execution during installation, upgrade, and uninstallation. These automation scripts are simply PowerShell scripts so it’s easy to start getting familiar with the additional functions that Chocolatey provides for managing software!
We don’t need to understand the technical differences between the feed versions. Only that what we create is v3, what Chocolatey needs is v2, and what we need to do to convert it.
What Do We Need Before We Start?
Before we start we need to have a few things in place.
Using Azure CLI and Azure DevOps Extension Command Line Tools
At the time of writing the Azure CLI tools and the Azure DevOps extension are in public preview and don’t support creating feeds at this time.
Create A Personal Access Token
Before we start let’s understand what we need, to create the Azure DevOps Artifact feed.
While you don’t have to create a Personal Access Token (or PAT) if you do not use 2FA on your Azure Account, my suggestion is to create one regardless. Doing so does two things:
- You won’t actually need to input your Azure DevOps password anywhere. The less you share that around, the safer it remains;
- You can put restrictions on a PAT that you can’t on a password. For example, when we create the PAT we will restrict it to pushing and pulling packages. Any task that is performed by that key that is not pushing or pulling packages, will fail. We could go one step further and create a PAT that only allows us to pull packages.
So, in this blog post, I’m going to go ahead and assume you are using a PAT. To create a PAT token from the Visual Studio portal:
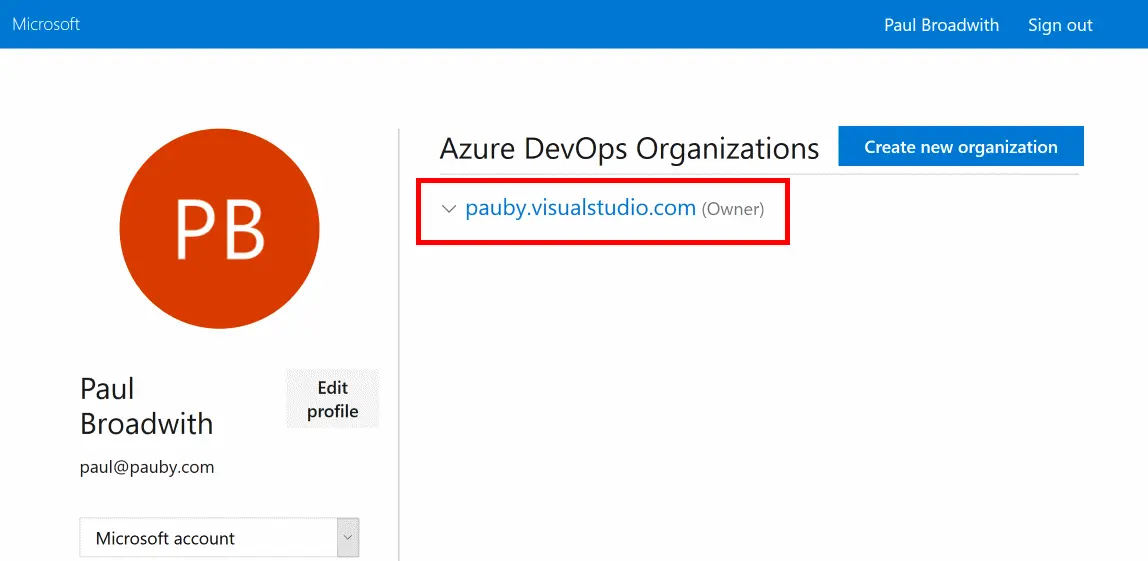
- Click on the Organization that where you will be creating the Azure DevOps Artifacts feed;
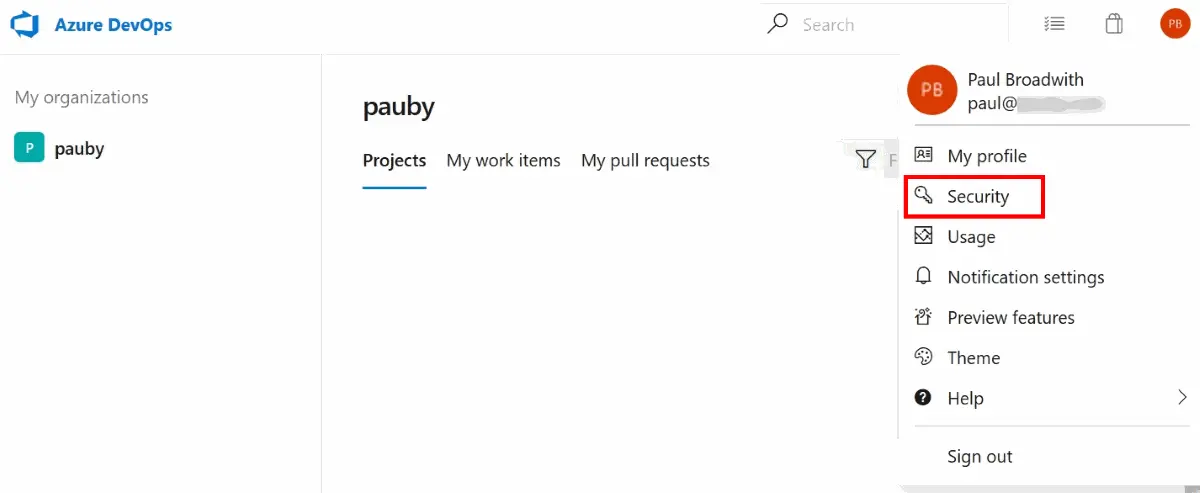
- Click your account avatar on the top right hand corner of the page and select Security;
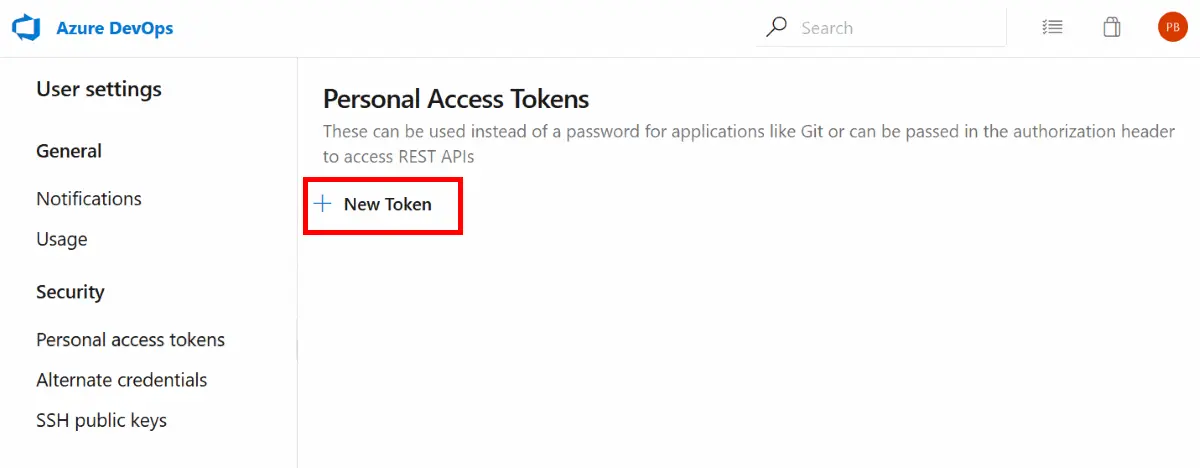
- On the Security page, click + New Token;
- On the pop-up window, complete the following:
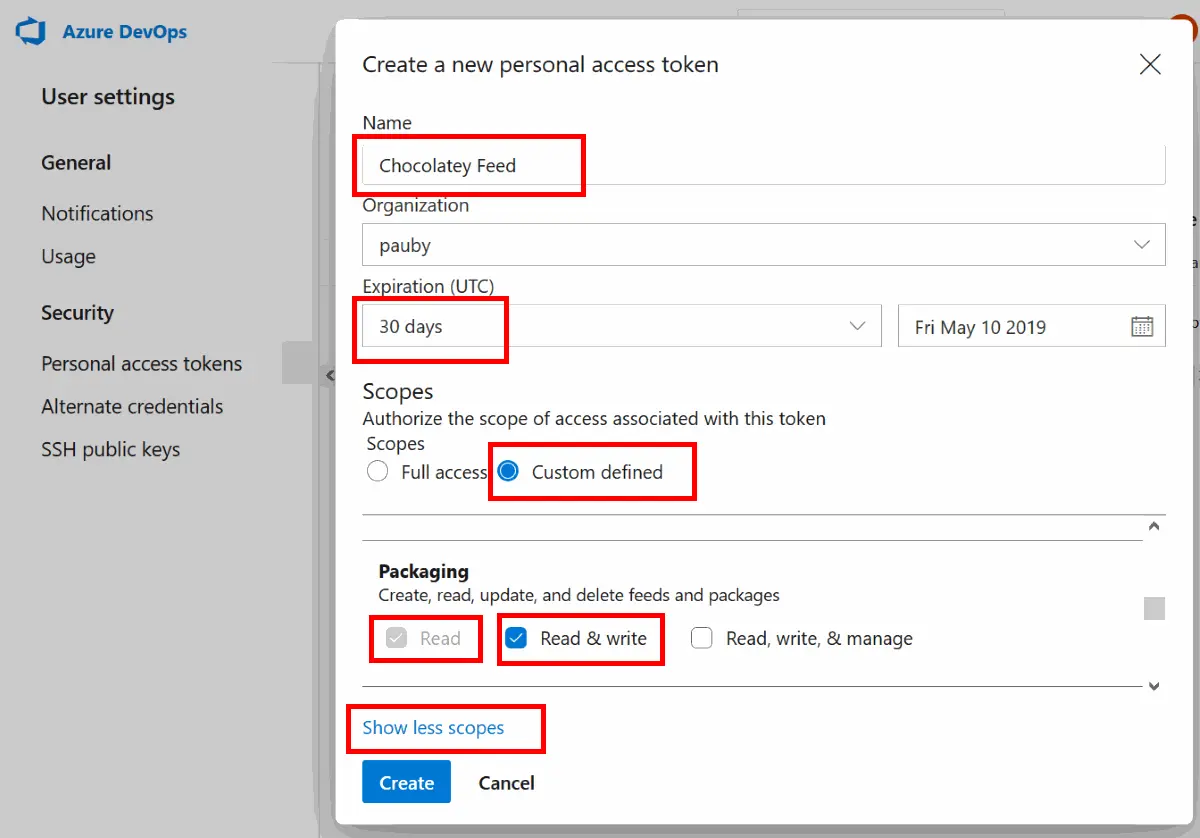
- Enter a name for this token - this can be anything and is just for you to identify what the token is for;
- Give whatever expiration you want for this token. Here we are using the default of 30 days;
- Under Scopes select
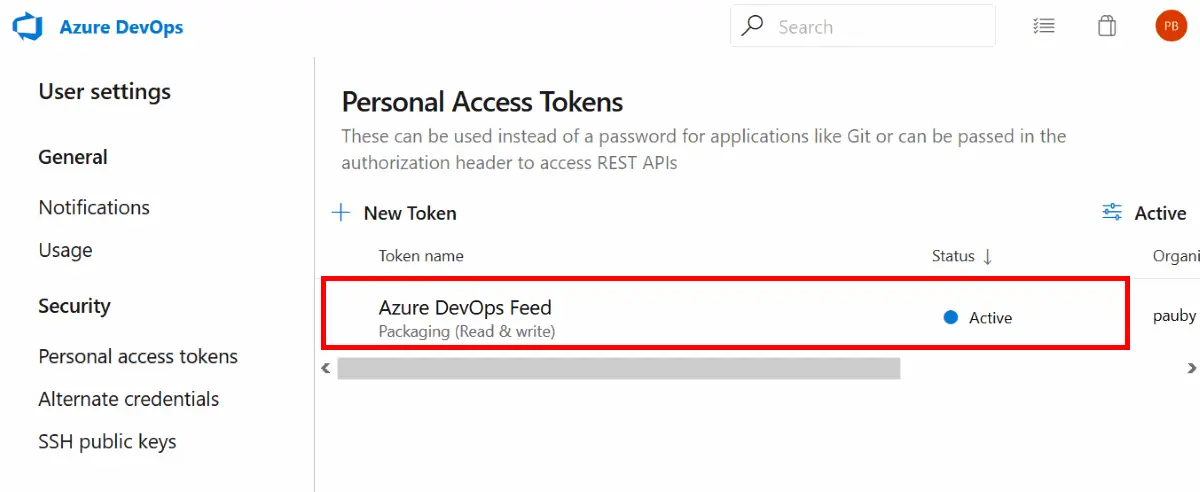
Custom Defined, click Show All Scopes and scroll the window until you see Package, then selectReadandRead & Write. This allows the token to push and pull packages. If you only want to pull packages, select onlyRead; - Click Create and on the next window note down your token. Note the warning as you will not see this token again;
- Refresh the web page, and you will see your new token in the list.


Add A Package Management License
We need a Package Builder license in order to be able to create a feed. If you do not have the option to create a new repository feed from the Artifacts menu then it is likely that you don’t have a Package Builder license assigned to your account. Every Azure DevOps account comes with 5 free licenses and have to be assigned by your subcription administrator (which may be you!). A license will be needed for every user who will push or consume packages from the feed. However, within that account you can have multiple tokens to use.
To manage the Package Builder licenses from the Visual Studio portal:
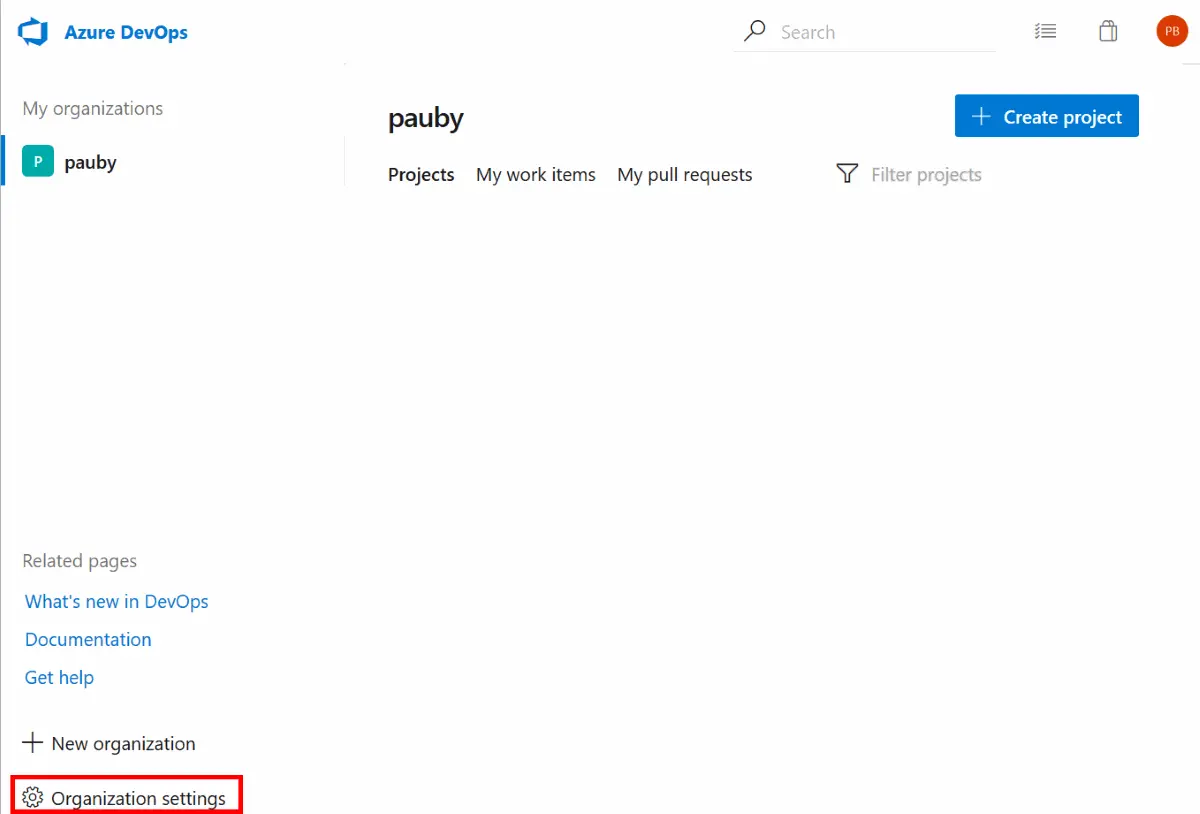
- Click on the Organization that where you will be creating the Azure DevOps Artifacts feed;
- Click Organization Settings;
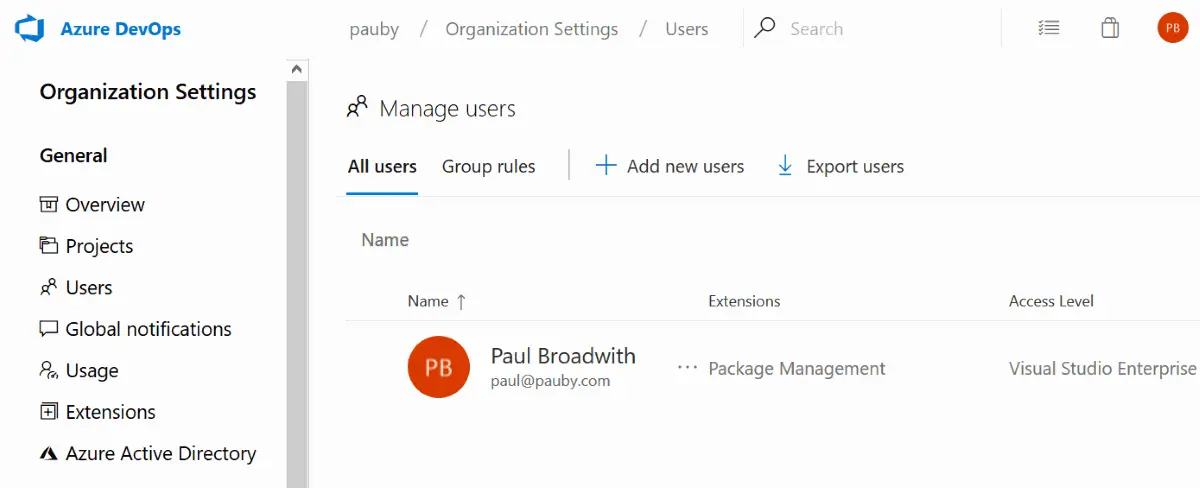
- Select Users;
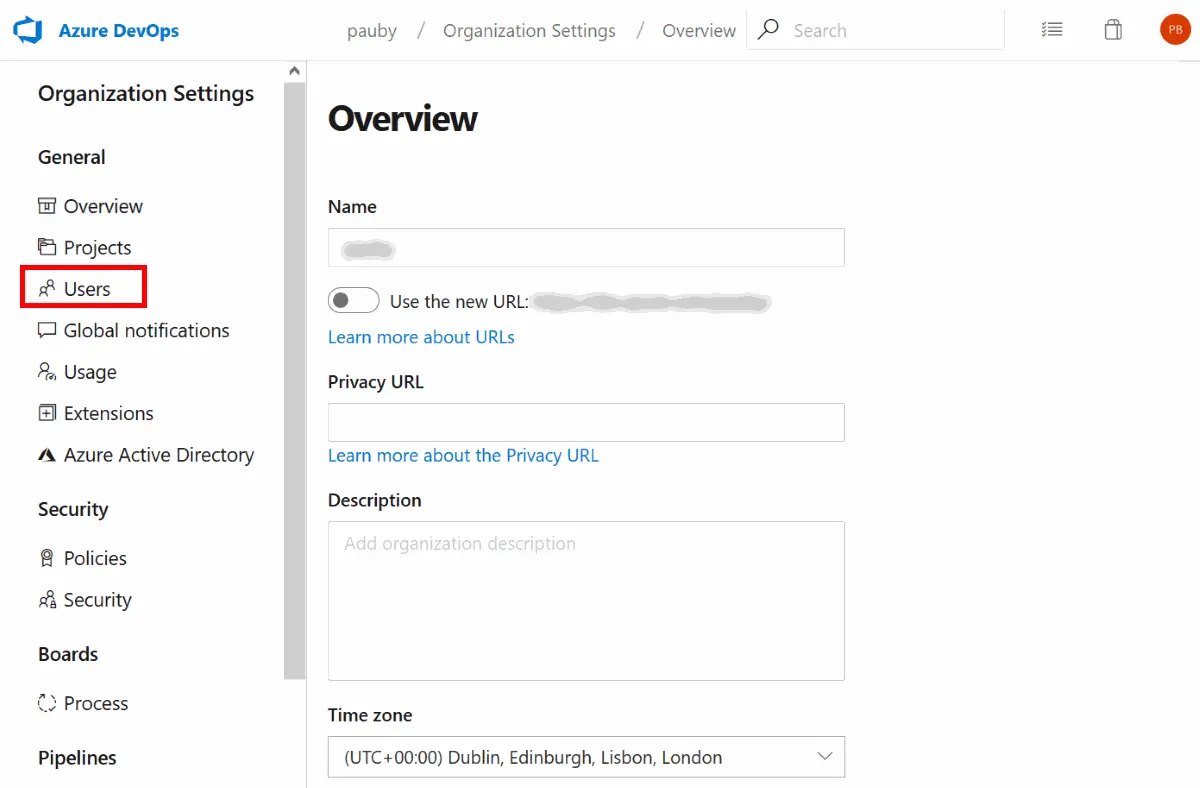
- Select the User you want to add the license to and click Manage Extensions;
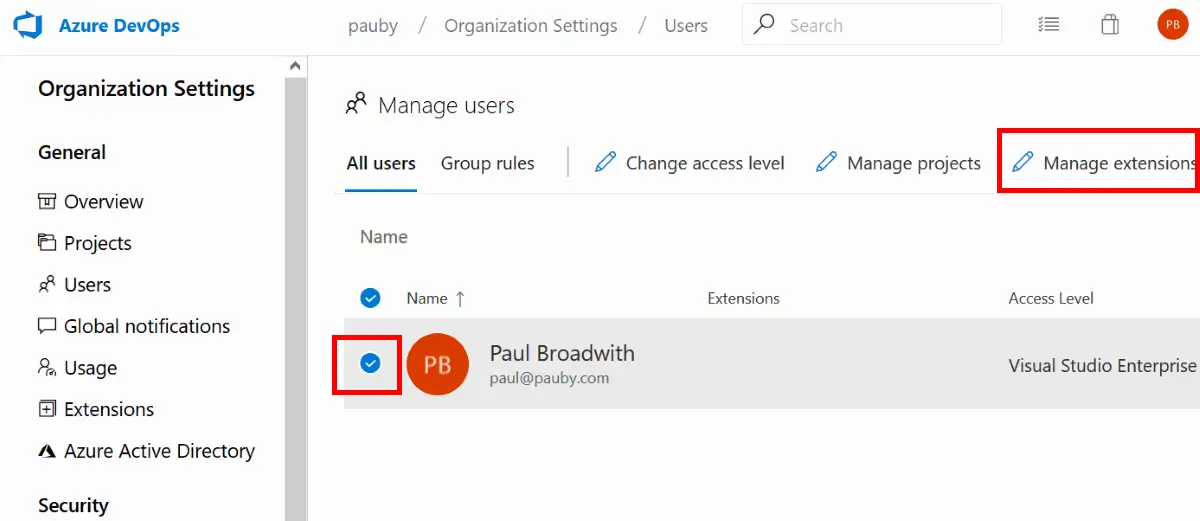
- Select
Package Management.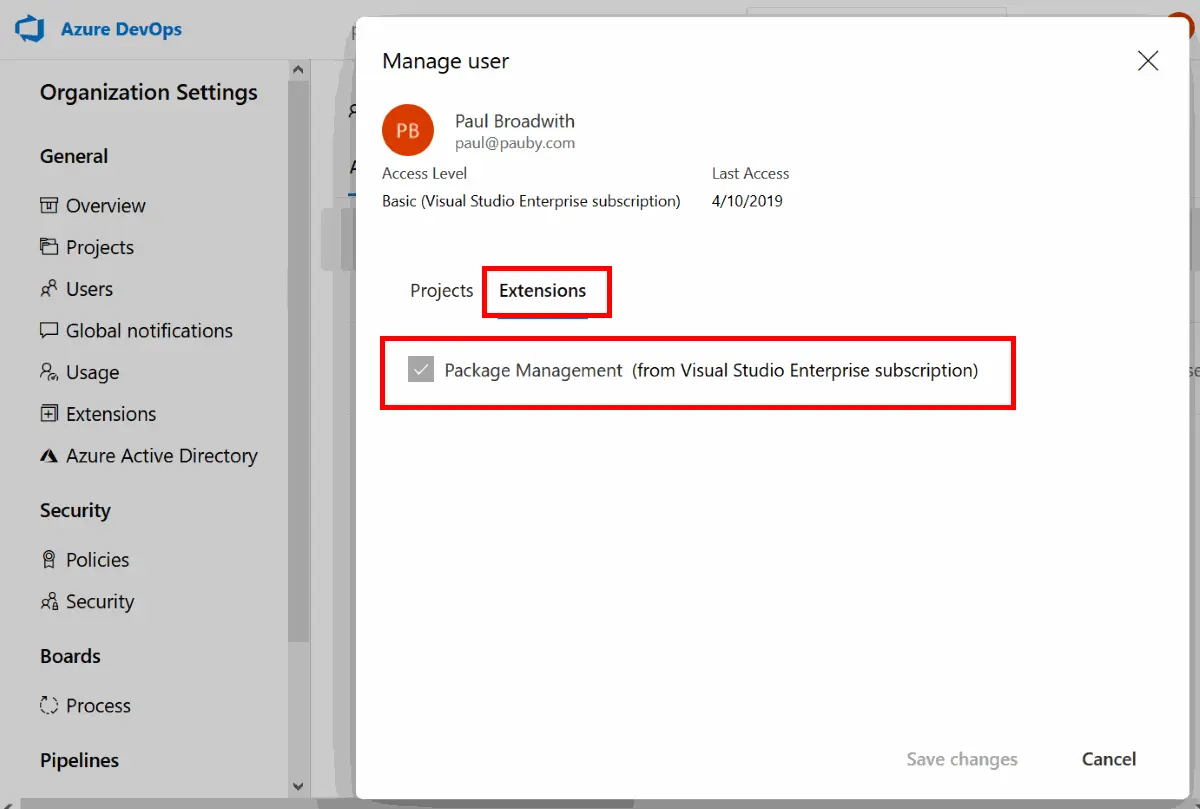
- Click Save Changes;


The account will now be able to create Azure DevOps Artifacts feeds.
Create the Azure DevOps Artifacts Feed
This is fairly straightforward to do from the Visual Studio portal;
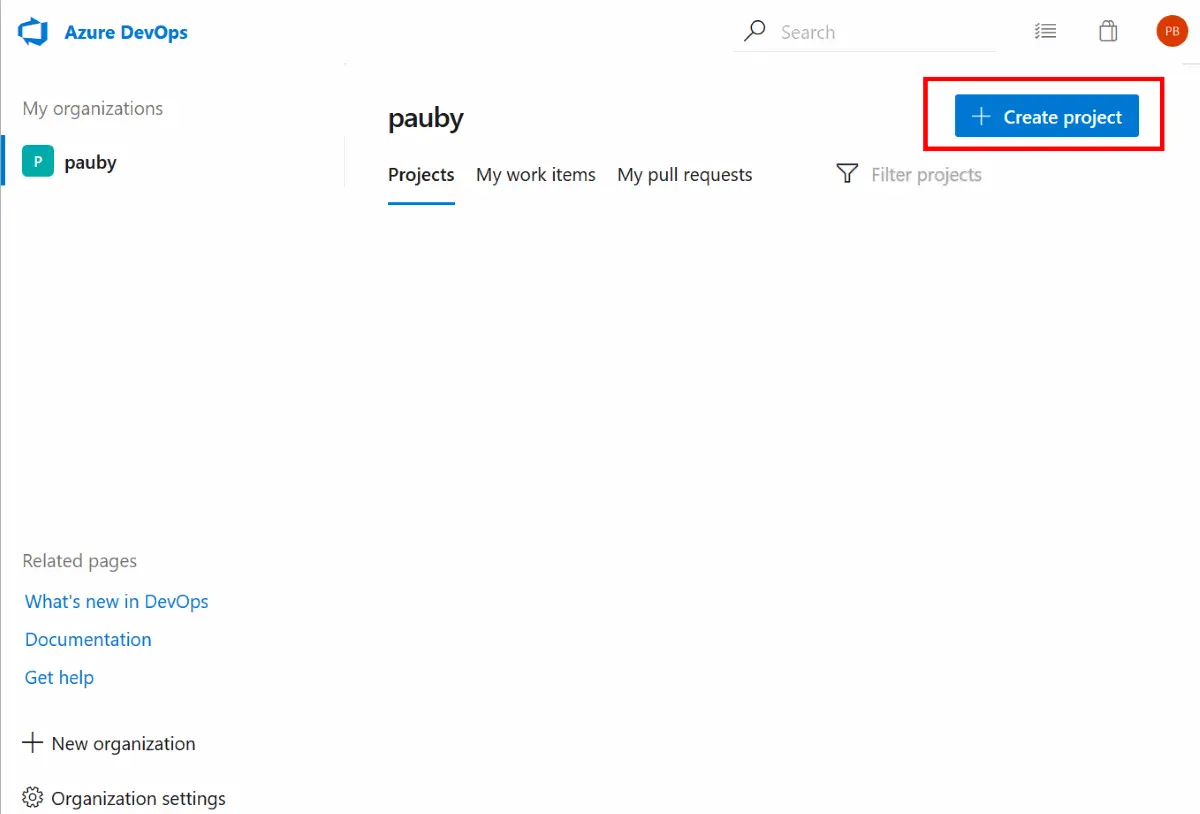
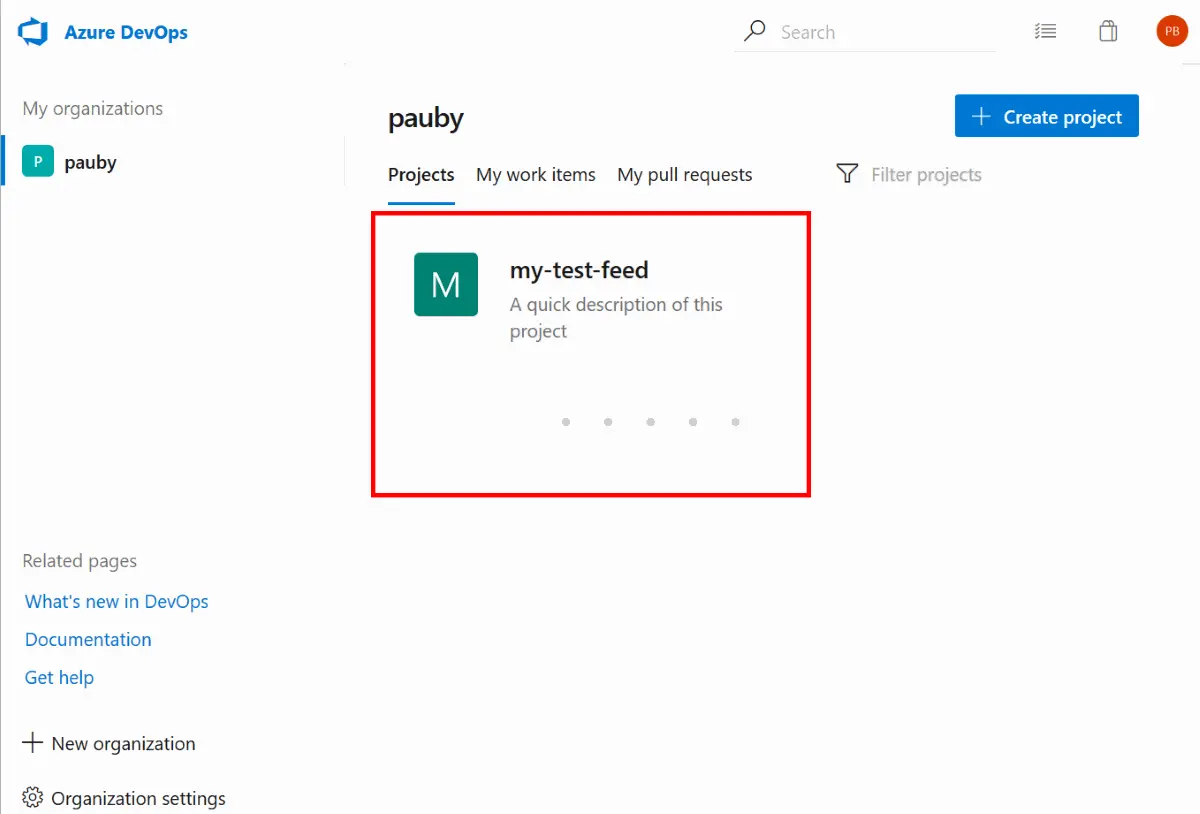
- Click your organization name under the heading Azure DevOps Organizations;
- Make sure you have the Projects* tab selected and click + Create Project;
- On the pop-up window complete the following:
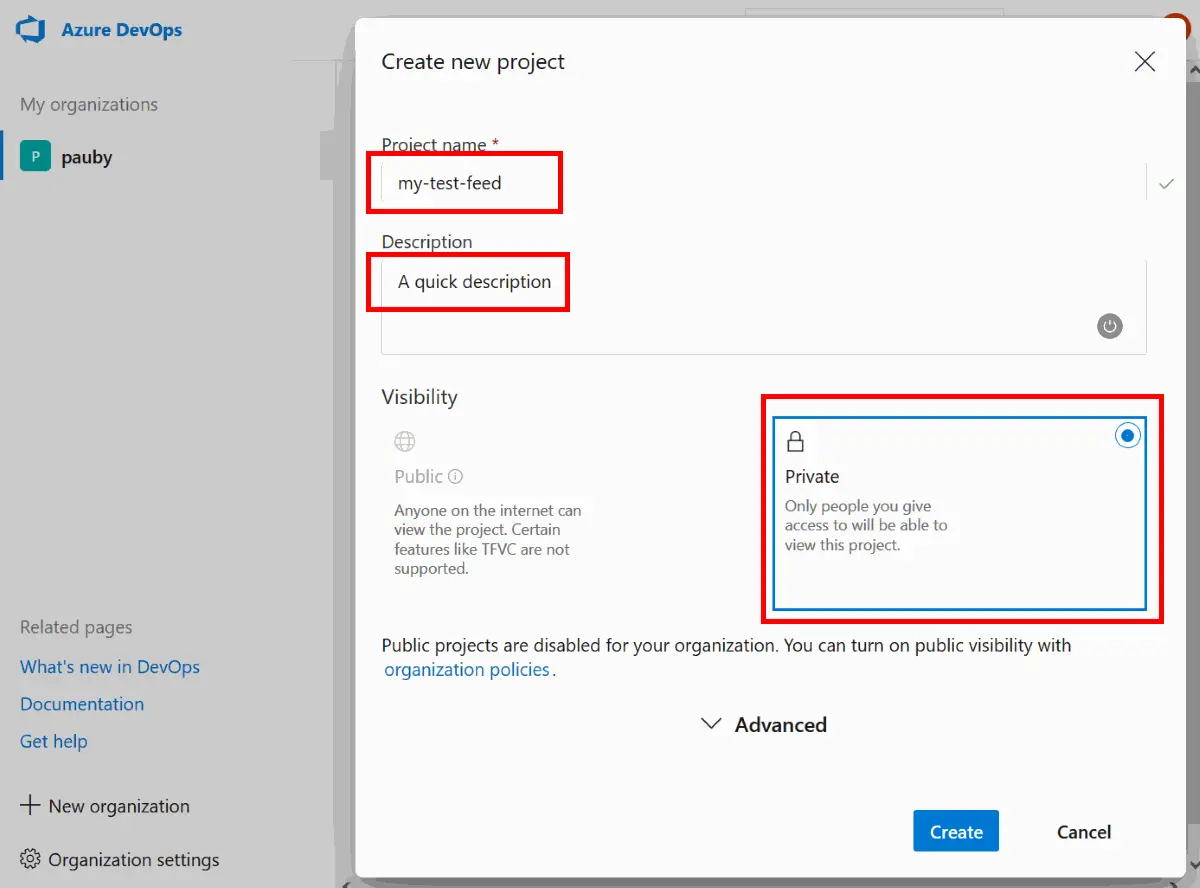
- Project name - this can be anything and is just the name you will use to identify it;
- Description - this is actually optional but can be useful if you have many projects and others working on them;
- Visibility - select
Private; - Once complete click the Create button;
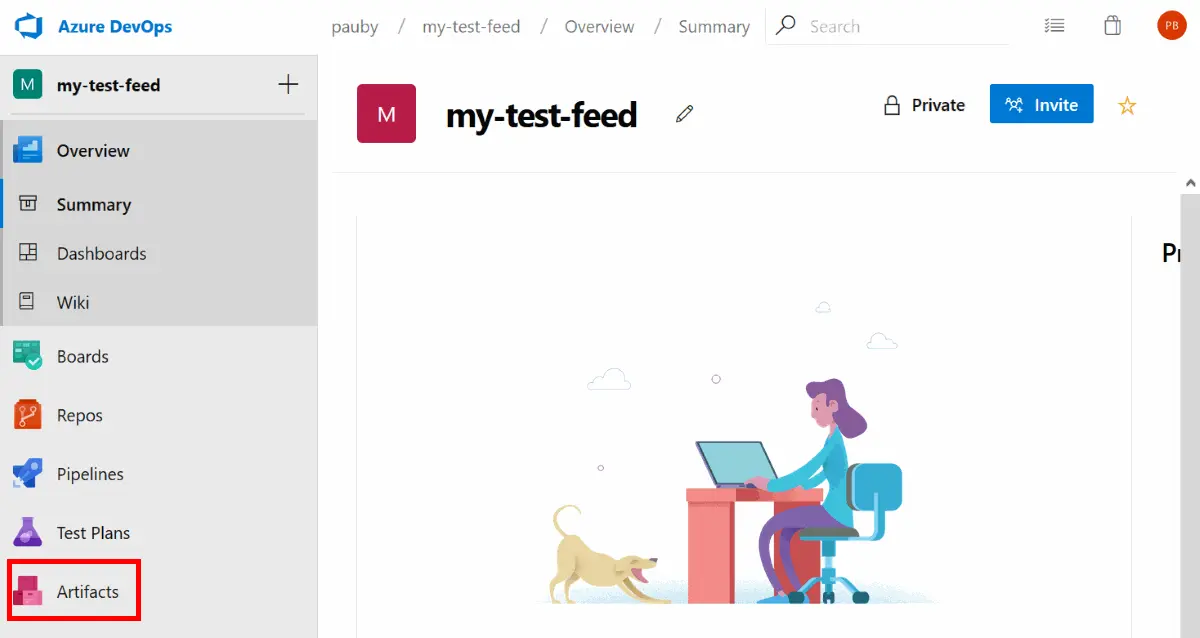
- Once your project is created, click Artifacts on the left hand side menu;
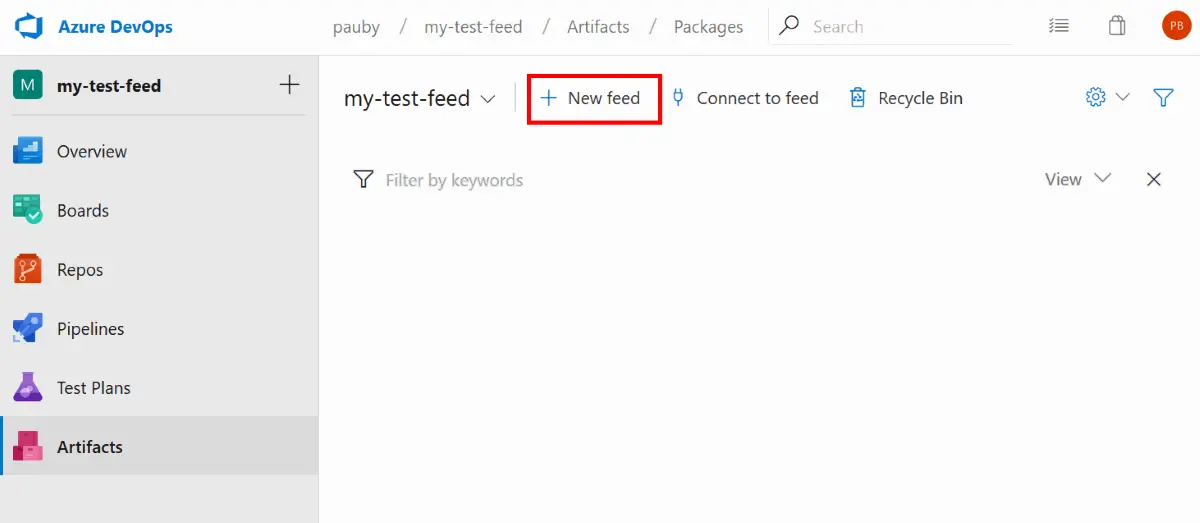
- Click + New Feed;
- On the pop-up window complete the following:

- Feed name - this can be anything and help you identify the feed;
- Visibility - this will be dependent up on your requirement;
- Public Source - this will also be dependent upon your needs;
- Once complete click the Create button. Note that if you cannot see the + New Feed option or if it’s greyed out you will need to add a Package Management license to your user account.;


Now we’ve created a feed, let’s move onto using it.
Pushing Chocolatey Packages
A feed is not much use without packages, so lets push our first Chocolatey package.
Before we start, we need a package to push! You can use your own, create a test package using choco new <PACKAGE NAME> or download one from the Chocolatey Community Repository. For this post I’m going to use the putty package from the Chocolatey Community Repository (click the Download link on that page and save it somewhere you can access from the command line).
As we mentioned earlier, Chocolatey requires a v2 NuGet feed. The Azure DevOps feed we created is a v3 feed that supports v2.
We need to get some details on how to connect to our feed and we can do that from the Visual Studio portal:
- Click the Organization that contains your feed;
- Select your project feed;
- Select Artifacts from the left hand menu;
- Click Connect to feed;
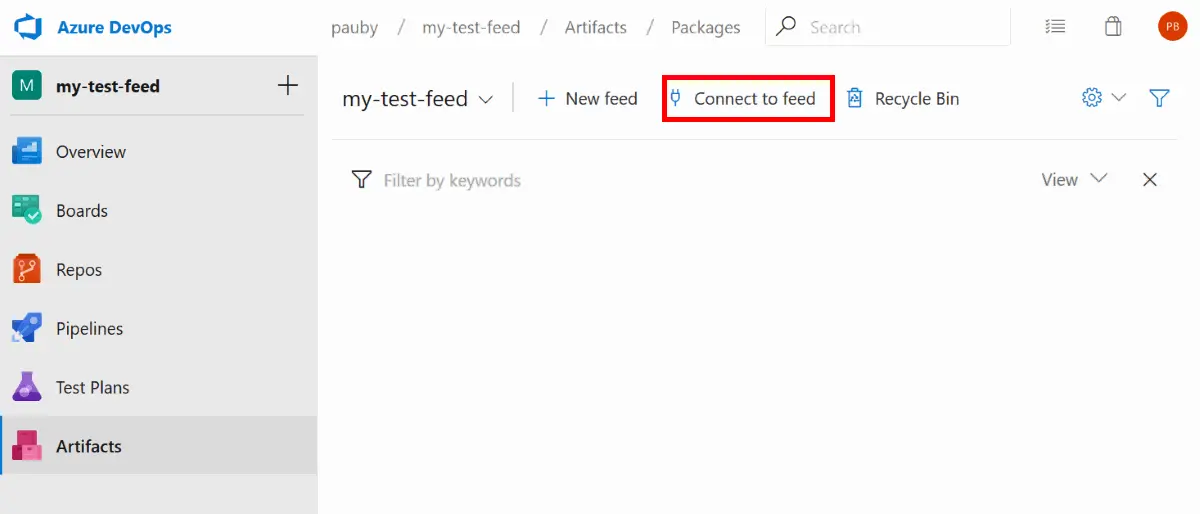
- Click Nuget and note the details in
Add this feedandPush a packageand click the Download NuGet + Credential Provider to download the tools we need to push a package. Once downloaded extract the ZIP file contents to a directory you can access from the command line. Click Close;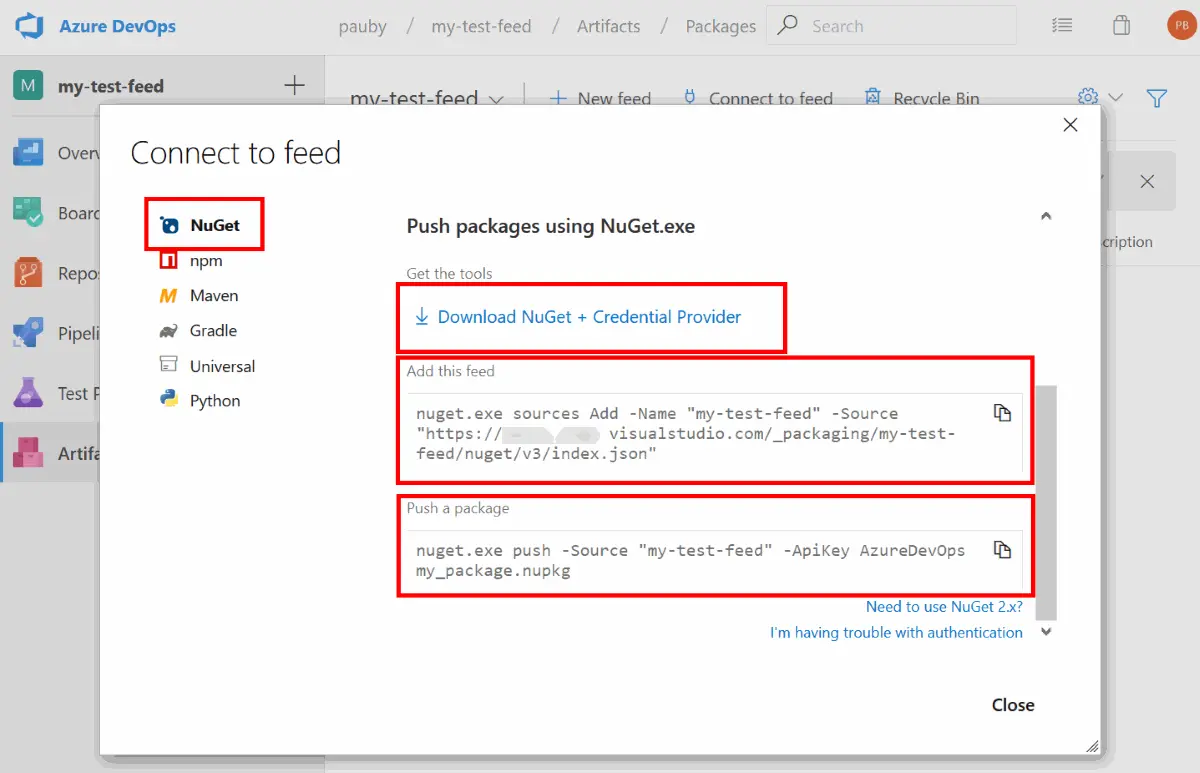


Now we have the details we need, we want to add our Azure DevOps Artifacts feed as a source for the NuGet command line tools. Lets do that now.
From the command line, change to the directory you extracted the NuGet.exe tool to and paste the command in from the Push a package box you saved earlier. In my case it was:
> nuget.exe sources Add -Name "my-test-feed" `
    -Source "https://example.visualstudio.com/_packaging/my-test-feed/nuget/v3/index.json"

Package Source with Name: my-test-feed added successfully.
The next step is to push our putty.install package.
> nuget.exe push -Source "my-test-feed" -ApiKey AzureDevOps putty.install.0.71.nupkg

MSBuild auto-detection: using msbuild version '15.9.21.664'
Please provide credentials for:
https://example.visualstudio.com/_packaging/my-test-feed/nuget/v3/index.json
UserName: [email protected]
Password: ****************************************************
Pushing putty.install.0.71.nupkg to
'https://example.visualstudio.com/_packaging/3b238214-ec4b-4794-a9b5-c51ce6321aa2/nuget/v2/'

  PUT
  https://example.visualstudio.com/_packaging/3b238214-ec4b-4794-a9b5-c51ce6321aa2/nuget/v2/
  Accepted
  https://example.visualstudio.com/_packaging/3b238214-ec4b-4794-a9b5-c51ce6321aa2/nuget/v2/
  18031ms

Your package was pushed.
Note that the -ApiKey is always AzureDevOps.
You may also be wondering why you can’t simply use choco push <PACKAGE> -s <AZURE DEVOPS ARTIFACTS FEED>. The reason for this is the way that the Azure DevOps Artifacts feed uses authentication. In Chocolatey you can add a named source with a username and password. That named source is then saved and can be used as a source to install packages from (as we will do next). However you cannot push to a named source using Chocolatey. You can only push to a URL source using Chocolatey. And since that source we need to push to requires username and password credentials, which we can’t add when pushing to a source URL, we won’t be able to authenticate.
If you refresh the Azure DevOps Artifacts Feed page you will see the package we have just pushed.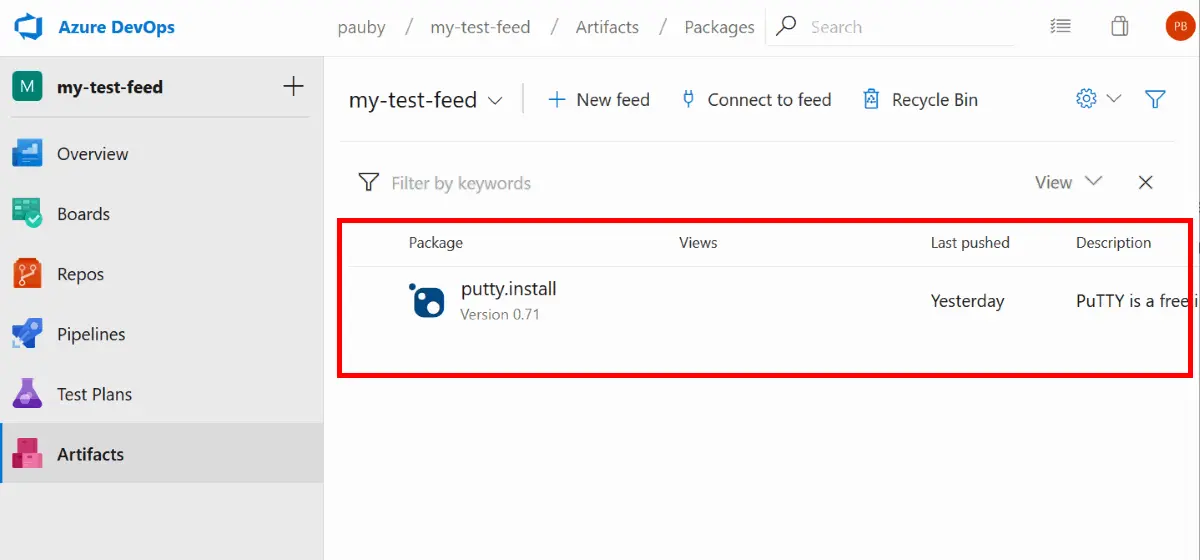
Adding A Chocolatey Azure DevOps Feed Named Source
We have the feed. We have the package(s). Now we should do something with them! Let’s install them using Chocolatey.
Before we start to go install crazy, lets add our Azure DevOps Artifacts feed to Chocolatey. We do this so we can simply provide the source name on the command line when installing with Chocolatey, without having to specify the credentials each time. Remember that the Azure DevOps Artifacts feed is a NuGet v3 feed and Chocolatey only supports v2 feeds at this time. So we need to change the Azure DevOps Artifacts feed source URL into a v2 one. To do that, we take the v3 feed URL we were given - https://example.visualstudio.com/_packaging/my-test-feed/nuget/v3/index.json - and replace v3/index.json with v2which gives us - https://example.visualstudio.com/_packaging/my-test-feed/nuget/v2. That is the source URL we need to add to Chocolatey:
> choco source add -n=my-test-feed `
   -s="https://example.visualstudio.com/_packaging/my-test-feed/nuget/v2" `
   -u="[email protected]" -p="my-pat-token"

Chocolatey v0.10.13
Added my-test-feed -
https://example.visualstudio.com/_packaging/my-test-feed/nuget/v2 (Priority 0)
Installing Chocolatey Packages From Azure DevOps Artifacts Feed
We have been building up to this moment: installing a package from our Azure DevOps Artifacts feed.
Let’s check what packages we have in there (remember we pushed the putty.install package) (note that this command can take a little time to don’t panic):
> choco list -s=my-test-feed

Chocolatey v0.10.13
putty.install 0.71
1 packages found.
Awesome. We can see the package we pushed. Let’s now try and install it.
> choco install putty.install -s my-test-feed

Chocolatey v0.10.13
Installing the following packages:
putty.install
By installing you accept licenses for the packages.
Progress: Downloading putty.install 0.71... 100%

putty.install v0.71
putty.install package files install completed. Performing other installation steps.
Installing 64-bit putty-64bit-0.71-installer.msi...
putty-64bit-0.71-installer.msi has been installed.
  putty.install may be able to be automatically uninstalled.
Environment Vars (like PATH) have changed. Close/reopen your shell to
 see the changes (or in powershell/cmd.exe just type `refreshenv`).
 The install of putty.install was successful.
  Software install location not explicitly set, could be in package or
  default install location if installer.

Chocolatey installed 1/1 packages.
 See the log for details (C:\ProgramData\chocolatey\logs\chocolatey.log).
And just to confirm it installed it from our Azure DevOps feed we can check the chocolatey.log (I’ve removed the date, time etc. simply for brevity):
Installing the following packages:
putty.install
By installing you accept licenses for the packages.
Switching source name my-test-feed to actual source value 'https://example.visualstudio.com/_packaging/my-test-feed/nuget/v2'.
Attempting to gather credentials for 'https://example.visualstudio.com/_packaging/my-test-feed/nuget/v2'
Using saved credentials
[NuGet] Installing 'putty.install 0.71'.
[NuGet] Added file 'LICENSE.txt' to folder 'putty.install\legal'.
[NuGet] Added file 'VERIFICATION.txt' to folder 'putty.install\legal'.
[NuGet] Added file 'chocolateyInstall.ps1' to folder 'putty.install\tools'.
[NuGet] Added file 'putty-0.71-installer.msi' to folder 'putty.install\tools'.
[NuGet] Added file 'putty-64bit-0.71-installer.msi' to folder 'putty.install\tools'.
[NuGet] Added file 'putty.install.nuspec' to folder 'putty.install'.
[NuGet] Added file 'putty.install.nupkg' to folder 'putty.install'.
[NuGet] Successfully installed 'putty.install 0.71'.
Summary
Setting up an Azure DevOps repository is not that much work. With 5 free licenses for every account, it gives you enough to play around with and see if it works for you. It’s a simple NuGet v2 / v3 feed that works well enough for a few packages but I haven’t tested beyond that as yet. You get 5 free licenses provided but one of the issues is that you have to add the authentication to the feed for every device that will use the source to download packages and not just to push them. This may or may not be an issue for you depending on your organization.
What attracts me to using a feed in Azure DevOps is that it’s relatively simple to setup, requires no virtual machine or other compute resources, is free (for up to 5 users) and therefore has no cost on you, and it’s straightforward to use. If only every piece of software was like that …
