WiFi Captive Portals Making It Difficult To Connect Your Travel Router?

I’m travelling a lot more these days so spending time in hotels is now for winding down and sleeping to minimise the effects of jet lag. Something I find doesn’t actually get any easier the more you travel. I now take my Chromecast with me. It’s just one of those things that just works. No fuss or hassle. So I don’t need to spend time trying to troubleshoot problems.
Hotels tend to use captive portals for signing in to their wifi via the web browser. The Chromecast doesn’t have a web browser so can’t connect. The solution would be to create my own private wifi network that it can connect to.
So basically a router. With a wifi hotspot.
What I need from a travel router
There are a lot of travel routers available so it was important to narrow that down by creating a list of what I needed:
- Small and lightweight;
- Run off USB power (so no lugging around power packs and cables);
- Simple, so less to manage and go wrong;
- No battery (as I want to pack it in checked baggage);
- Needs to work with ‘hotel’ wifi;
- OpenVPN support as a client;
The last one wasn’t a deal breaker as I use IPVanish on all of my devices but it’s a nice to have.
After a bit of research I settled on the GL.iNet range of products. They tick all of the boxes and have good reviews. The base model, Mango has everything I needed but for a little more money the Shadow (AR-300M) has the better Qualcomm CPU. So that’s what I settled for.
When it arrived, the first thing I did was a factory reset it (suggested by a helpful Amazon review). I connected it to my home wifi, connected devices to it and it just worked. Hotel wifi is another beast entirely.
The first hotel
So here I am in a Marriot owned hotel in Kansas City, Missouri and it was time to try out creating my first private wifi hotspot. Most hotel wifi uses a captive portal sign in page to register the device. This is usually done using the MAC address of the device, to permit access. As the travel router does nto have a browser to sign in we need to give it the MAC address of a device that does.
Easy. Or so I thought.
The Marriot Hotel I was staying at provided an ethernet cable for internet, as well as wifi. So I used that. Gave it the MAC address of my laptop. But couldn’t connect to the internet. Any device I connected to the travel router private hotspot couldn’t get internet access either. I couldn’t even ping the hotel wifi gateway!
I then tried to connect the travel router to the hotel wifi. Exactly the same issues - couldn’t connect to the internet and couldn’t even ping the gateway!
After several hours of troubleshooting I found a forum post outlining a workaround. It wasn’t the travel routers fault apparently. It was The Marriot hotels’ weird and wonderful way of doing things that the travel router needed a helping hand with.
So I tried to implement the workaround. But the instructions were not clear and eventually I had to throw in the towel and give up. The forum post mentioned The Marriot were upgrading the wifi service across their hotels. Some have the new system and some don’t. I concluded that this hotel had a new, more restrictive system that the travel router could not work with.
I then went to bed.
… a short time later
When I cannot overcome a problem I can find difficult to let go. That’s a strength and a weakness. Tenacity is a good thing. But so is knowing when to give up. Couple that with a lack of sleep and jet lag and I was grumpy and determined.
So, I spent another hour troubleshooting. Then I went for breakfast.
When I came back I decided I would give it one last go. And, you’ll be finally glad to hear after reading up to this point, I got it working!
Here’s how I did it.
Some notes before we start
Before I start there are a couple of points to make.
You may be able to skip some steps below. This worked for me as is. It may not work for you;
The GL.iNet AR300M is a quirky little device with it’s own idiosyncrasies. It will frustrate you. Stay calm or you’re not going to get this to work;
Other hotels will use the same system as The Marriot. So these steps may work with others;
Reboot your travel router before you start. It’s always a good idea to start from a clean state. To do this hold the Reset button until the middle LED starts flashing faster (will happen after 3 seconds). Note that holding it for 10 seconds will restore factory settings. So be careful!
I recommend disconnecting any other devices you have connected to your travel router. Only connect the device you will be using for these steps;
If you have OpenVPN client setup I have noticed that while going through these steps it tries to connect, fails and blocks all network traffic. So it looks like you are not connected to the hotel wifi and these steps don’t work. My advice is to check OpenVPN is not trying to connect before you start and if you experience connection issues;
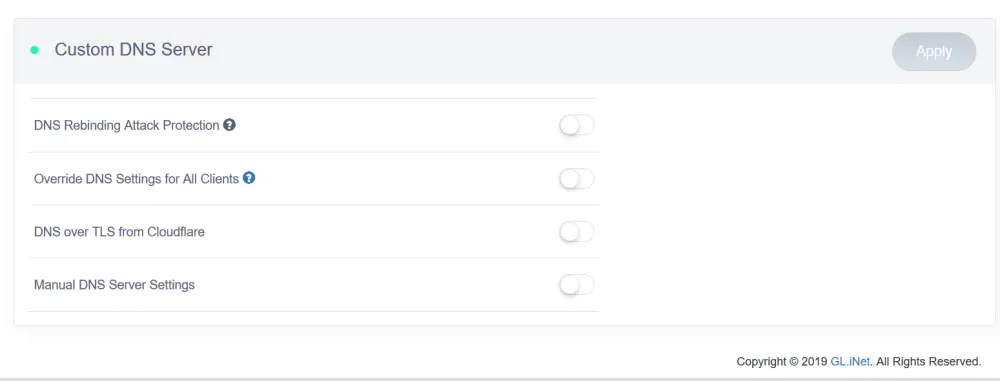
I had all of the Custom DNS Server settings disabled. To do this in the GL.iNet console, click the More Settings menu and then Custom DNS Server and make sure all options are turned off;
The previous night I had changed a lot of settings while troubleshooting. So I could start with a clean slate I did a factory reset. You are unlikely to have to do this. If you do be aware you will have to reconfigure everything. I was lucky that this was the first time I’d used it so reconfiguration took me about 2 minutes. To do a factory reset:
- On the main menu click More Settings menu and then click Revert Firmware;
- Click Revert Now;
And finally.
It’s important that you use the same device throughout all of these steps. And that the device you use hasn’t been registered on the hotel wifi. I think the wifi captive portal page is triggered by using a device that hasn’t been signed in before. I will try and confirm this next time I’m at a hotel.
Sign in to the hotel wifi captive portal through your travel router
Let’s get on with connecting to The Marriot wifi!
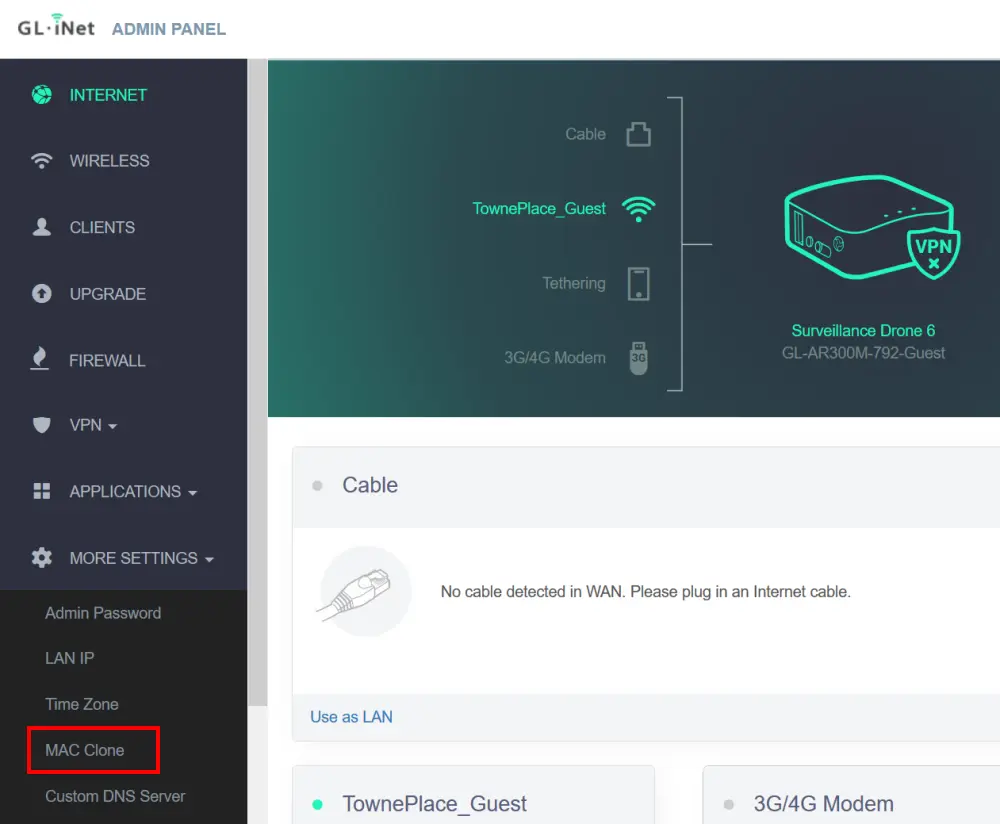
Connect to the GL.iNet admin panel. I had to connect to
http://192.168.8.1and enter the admin password;From the main menu click More Settings and then MAC Clone;
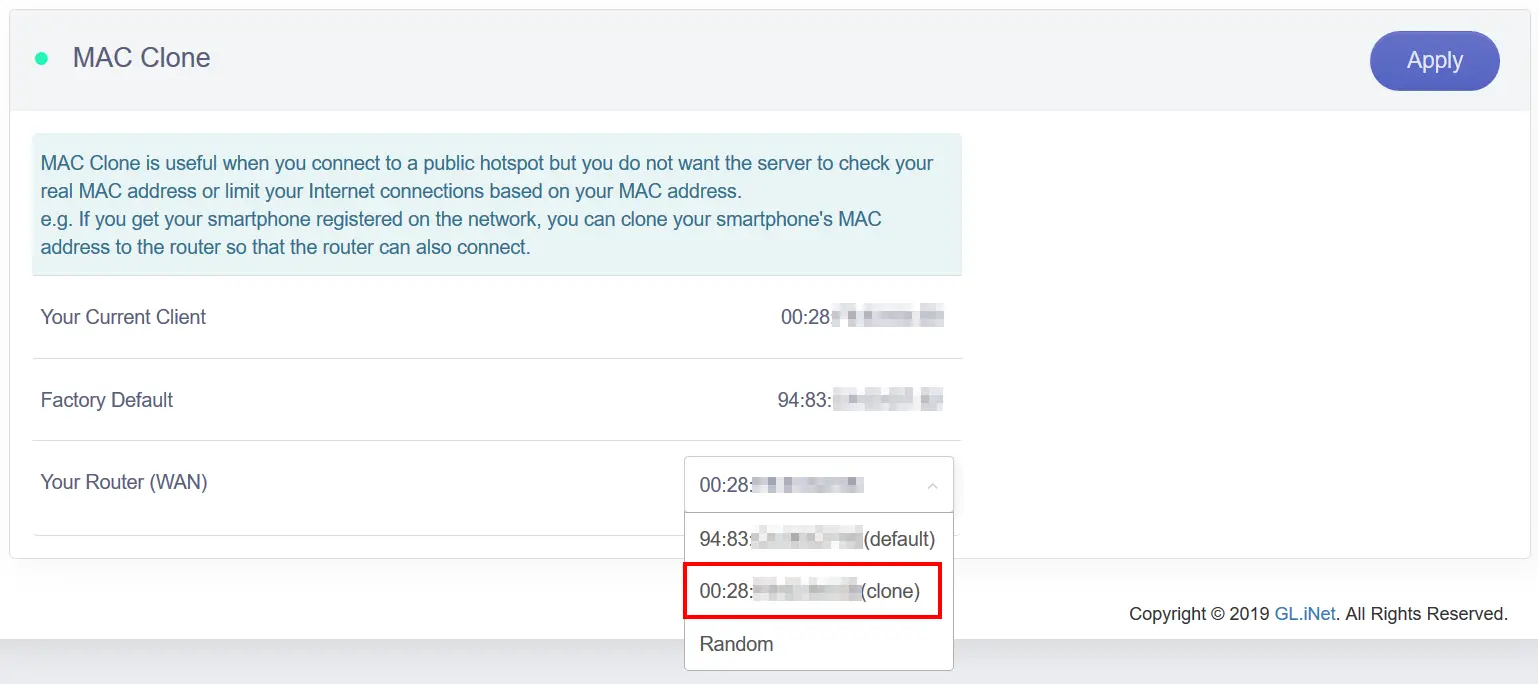
On the MAC Clone page, select the MAC address that is shown as (clone) in the dropdown list. Click Apply;
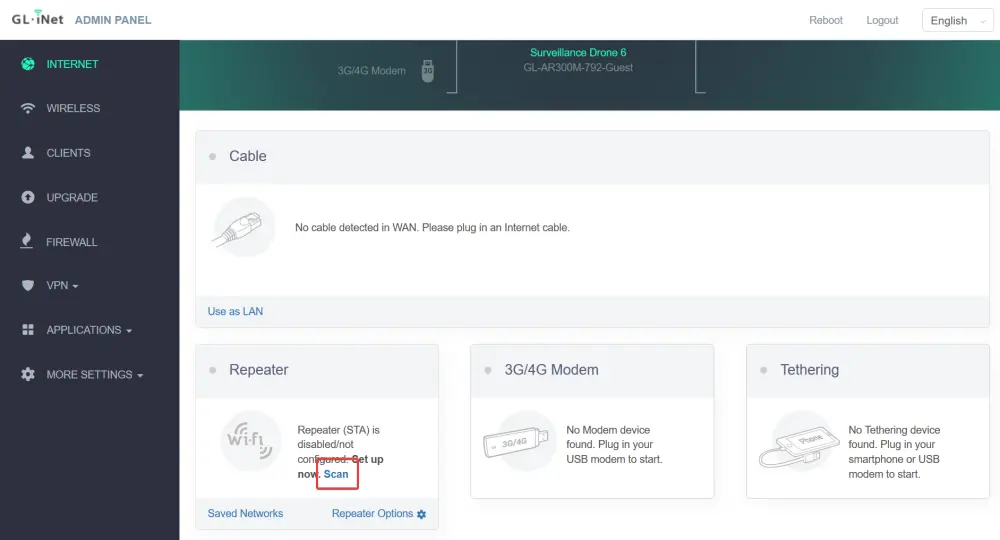
Click Internet on the main menu. Then, in the Repeater box, click Scan;
When the scan is complete select the hotel wifi you want to connect from the dropdown menu (mine was
TOWNEPLACE_GUEST). Click Join;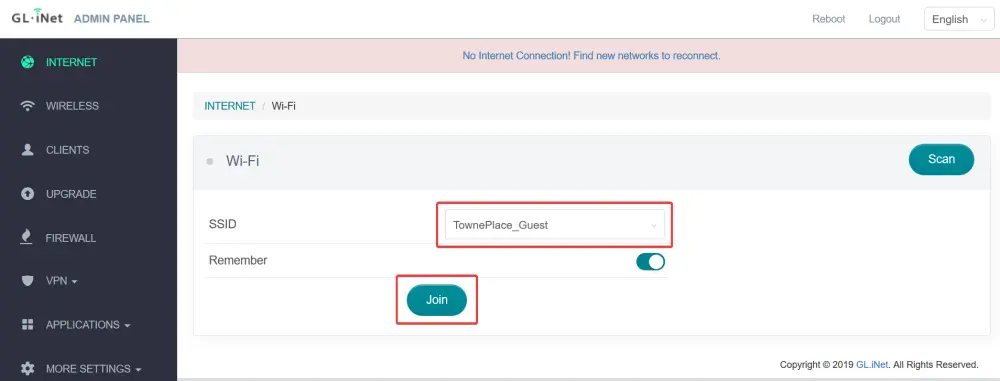
Click Internet on the main menu. Once you see the hotel wifi name (mine was
TOWNEPLACE_GUEST) appear with an IP address, make a note of the Gateway IP address. We will need it later;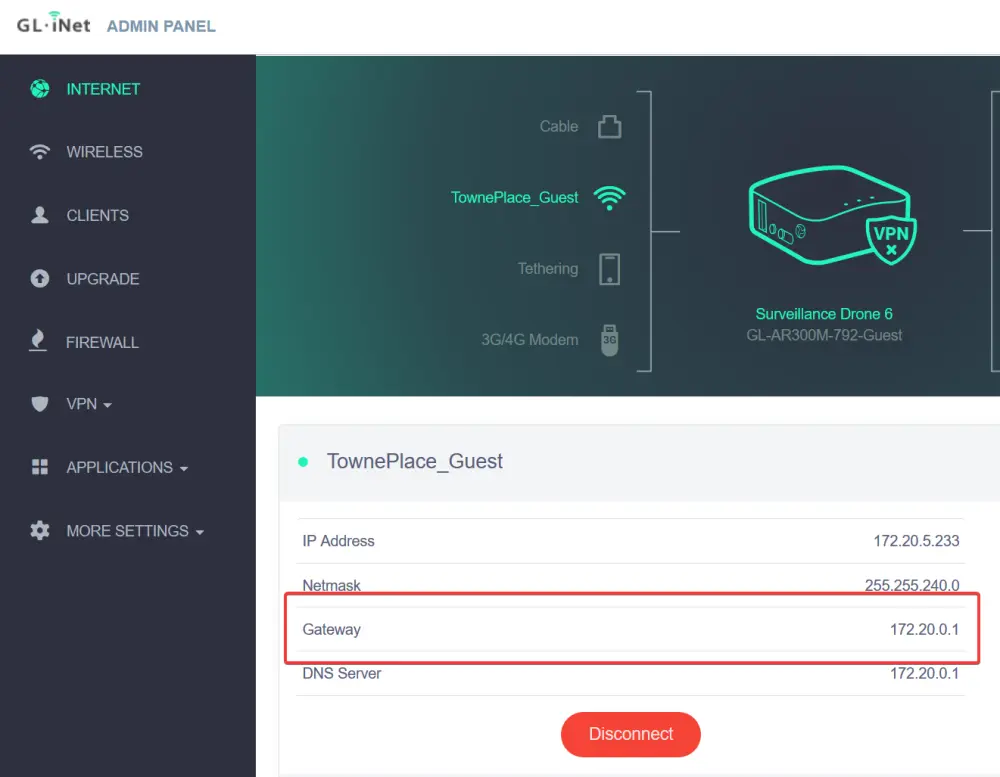
Completing the last step caused a popup with
You must login ...to appear (I’m using Firefox so you may see something different). Click the Login button and you will see the wifi sign in page appear. The page will fail to load, but that’s okay. If that page does not appear, try browsing to cnn.com or neverssl.com. There may be others that work but those worked for me in tests;When the sign in page fails to load look at the browser address bar. It will show something similar to
https://mcita.cust.blueprintrf.com:8001. We are need to note part of this. The bit afterhttps://and before the:8081. Using the previous example it would bemcita.cust.blueprintrf.com. Make a note of it;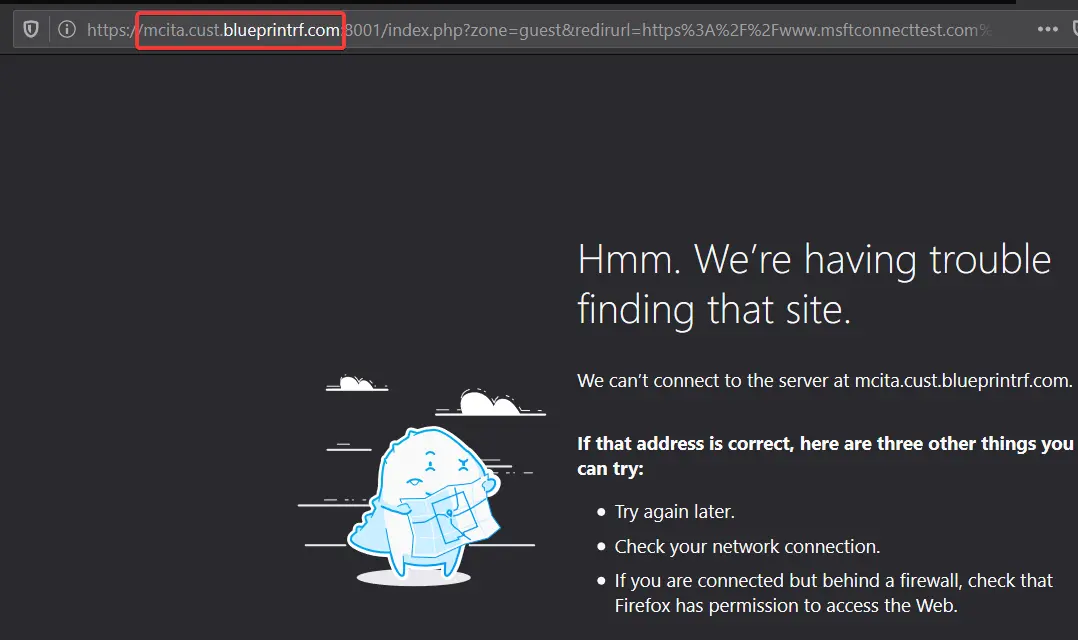
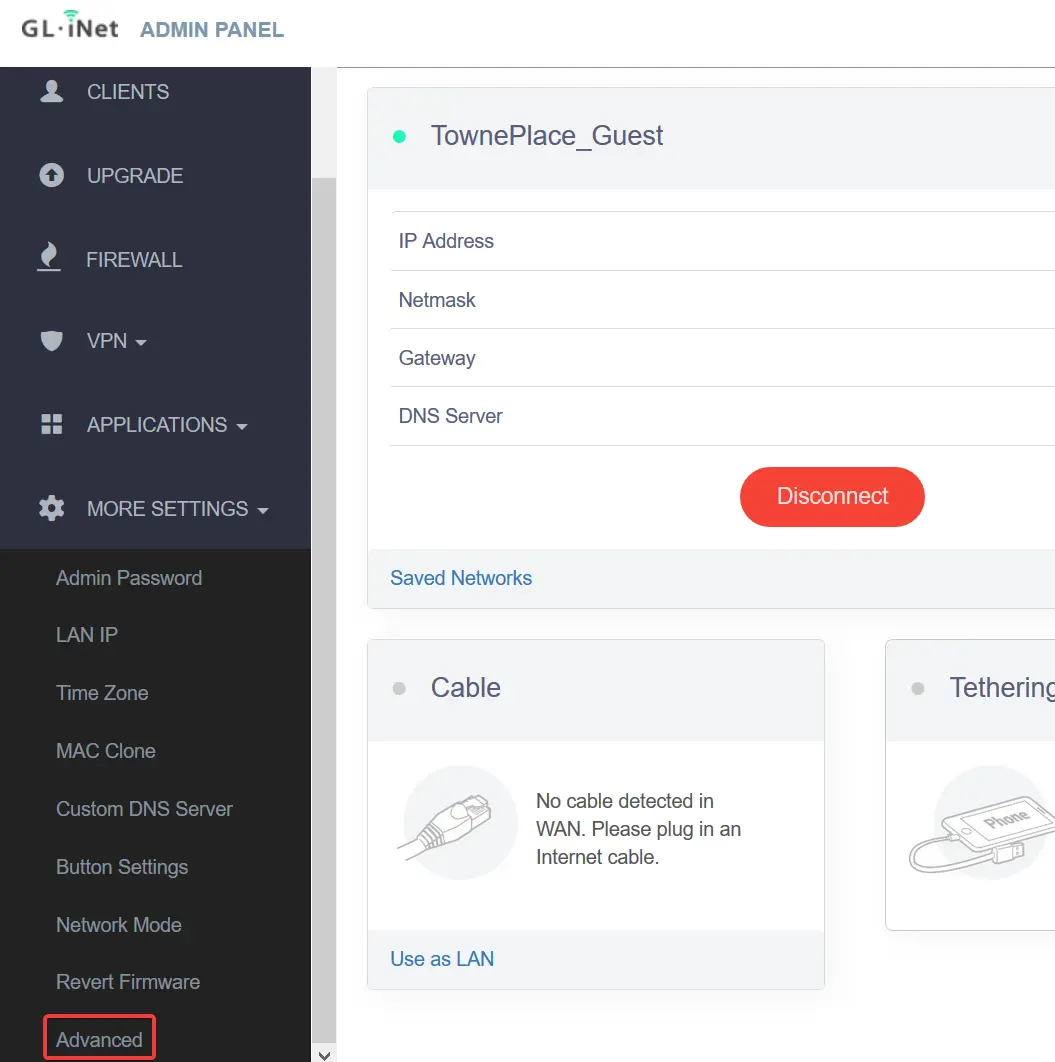
Go back to the GL.iNet admin console and click More Settings and then Advanced. When prompted, login using the same password you use to login to the GL.iNet admin console;
From the top menu click Network and then Hostnames. Then click the Add button. In the first box, under Hostname, enter the name we made a note of in step 8 above (our example was
mcita.cust.blueprintrf.com). In the second box, under IP address, select from the dropdown the IP address that we noted for the Gateway in step 6 above. If you don’t see this IP address in the list make sure something else in the list is not using it. If it is, remove that entry by clicking Delete (I would also recommend you reboot the router by clicking System and then Reboot). Click Save & Apply;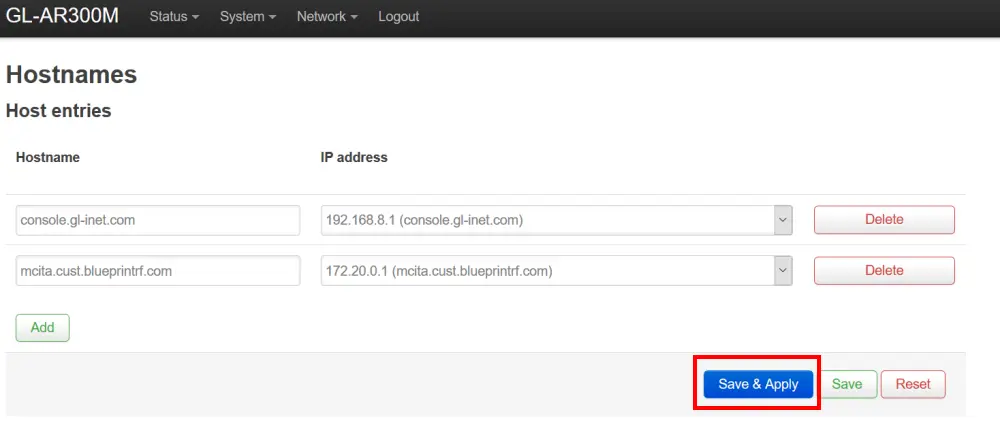
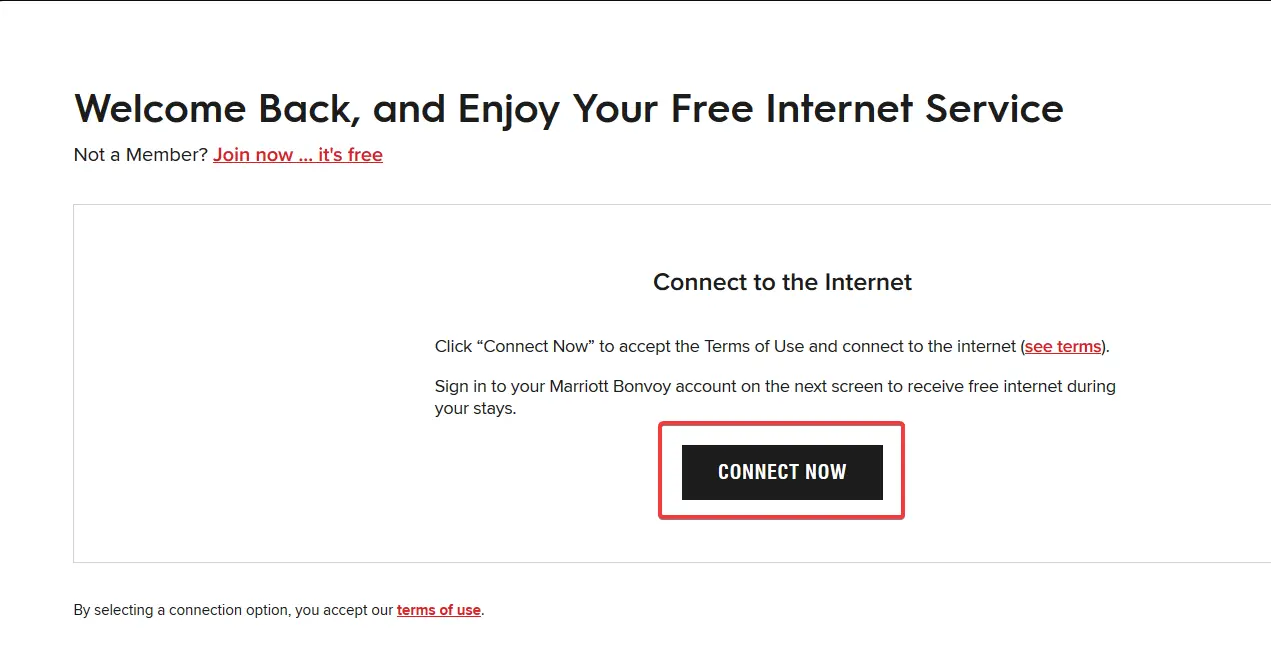
Refresh the hotel wifi sign in page that failed at step 7. One of two things will happen here:
The page will either load and you can then sign in to the wifi, or
It will fail to load again, in which case wait 30 seconds and try again. If it fails to load on the second or third attempt my suggestion would be to reboot the travel router and then go back through all of these steps again. If this still doesn’t work then there are lots of things you can try but there are too many options to give them here.


I currently have 5 devices connected to the travel router:
- Two Windows laptops;
- 1 Android tablet;
- 1 Android watch;
- 1 Android phone
Connecting to wifi through captive portals with your travel router makes things more difficult, but not impossible. You can now create your own private wifi hotspot while you’re travelling without jumping through hoops. Hopefully this saves you the pain I went through.
